How to make Model Railroad crossing lights. A step by step tutorial with an image gallery that you can use for reference.
But first some important information.
Grade Crossing Tutorials

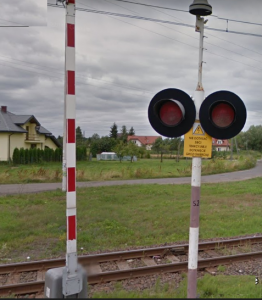
The light stands are, regardless of region, generally the same. A pole and shaded lights about 30 cm in diameter. Most have 2 lights facing in one direction. Some will have 4 lights with 2 facing in opposite directions.
The images below show some variations.
This is a simple flashing light with a warning bell that starts and finishes when the lights do. On a prototype railway, that occurs when a train traveling at the maximum expected speed is 20 seconds from entering the crossing.
The next two images give you basic information about crossing lights. The images and information are summarized from Federal Highway Administration, Railroad-Highway Grade Crossing Handbook – Revised Second Edition August 2007. It is US related but much of the information is universally applicable. Do take the time to read it.
For summary information, click on each of the images.
A look at the back of a grade crossing light
General Grade Crossing Light Construction Notes
The construction of a light is covered in detail in one of the videos in the video gallery at the top of the page.
And these are supplemental notes.
 To the left is a very simple plan.
When modeling the lights, common washers can be used for the light holders.
Spray the washer black.
Shrink tube is inserted and ACA glued into the hole in the washer and shaved to the shape of a shade.
A red colored piece of acetate is ACA glued to the back of the washer and a prewired SMD led or 604 SMD LED with magnet wire attached is taped behind that acetate.
Repeat this process as often as you need lights.
The pole is made out of a brass tube. The tube will be painted the distinctive color dictated by the particular grade crossing.
To ensure paint sticks to brass, it must first be coated with a metal primer. To ensure that the paint sticks and that there are no brush marks, spray it with Rustoleum metal primer.
If there will be alternating stripes, such as red and white, spray the white first. Then mask and spray the red.
The cross bar that holds the lights in place can be a anything from a very small diameter tube to a piece of channel or heavy paper or thin card formed around the wires. The gallery
ACA everything in place.
Add signs as desired.
The foundation can be thick card or wood painted concrete gray. A brass tube for a sleeve can be added in the fashion of the line drawings above.
Related Level Crossing Pages
How To Make An Automated Level Crossing –
How To Install A Level Crossing In Your Layout. –
Arduino How To Install An IR Sensor Under Track
How To Make Level Crossing Gates –
How To Make Level Crossing Flashing Lights–
How To Make Automated Level Crossing Flashing Lights –
How To Make Automated Level Crossing With Flashing Lights Plus 2 Gates For 1 To 3 Tracks –
How To Make Automated Level Crossing With Flashing Lights Plus 4 Gates For 1 To 3 Tracks –
How To Add Warning Bells At Model Railroad Level Crossings –
How To Make A Level Crossing Control Circuit Board –
How To Install Automated Level Crossing Operating Mechanism
Crossing Light Image Gallery
[Best_Wordpress_Gallery id=”16″ gal_title=”Crossing Lights”]


