

How to make a servo controlled DIY slow moving turnout motor to control 1 or more turnouts.
This shows you how to control 1 motor from one Arduino board. This is a rather sophisticated sketch that we use in our layout as a module.
The Sketch For Controlling DIY Slow Moving Turnout Motors
This sketch uses momentary contact buttons to cause the turnout to change positions..
For your convenience, we keep the sketch on pastebin. It makes it easy for you to review and download it. Go to DIY Slow Moving Turnout Motor
This shows, using the code simulator Woki, how the sketch performs.
Wiring Instructions For 1 Switch Machine
 You can use either an Arduino Uno , Arduino Mega or nano
The servo that we use is a Tower Pro Micro Servo 9g SG90. You can buy them on eBay, AliExpress or Albaba. They are probably cheap Chinese knockoffs and often they are somewhat erratic. But they are cheap.
Additionally, you can get kit to make this controller at KITS.
If you wish to use fewer signals, just do not hook up the LEDs. There is no need to change he code.
The red wire is the power to the servo. Normally, for best operation and so that you do not overload your Arduino board, servos should be connected to a separate 5 V power supply rather than being connected to the Arduino board.
I never power servos from the board.
The servo negative wire can be connected to a separate bus but that also must be connected to the Arduino board ground.
Because pin 12 is fixed as INPUT_Pullup, a dropping resistor is not needed on that pin.
A resistor should be installed between each pin and the positive side of the LED. Calculate the resistor size after looking at the specs for your LED. Here is a link to a LED resistor calculator.
Always keep in the forefront of your mind that Arduino boards have maximum power limits. And Arduino says that you should not push your board close to the maximum. That means, if you have your servos powered from an external sourc..
Be safe. Power servos from a separate source.
You can adjust the arc of movement of the arm by changing these numbers that are in the sketch and then upload the changed sketch. Save under a new name so, should the need arise you can use the old one
These are the line to look for: const int straight = 90; const int divergent = 110;
Start by removing the servo arm from the servo and reinstall it in the approximate starting position that you want. Then adjust by changing the numbers above.
If you don’t know how to upload the new sketch, go to this page. How To Change And Upload An Arduino Sketch.
You can change the speed the arm travels through the arc by changing this number that is in the sketch.
// servo movement step delay, in milliseconds
const int step_delay = 70;
The number determines the millisecond delay between steps the servo takes. A lower number, the slower the travel.
Once again judiciously rename your changed sketches.
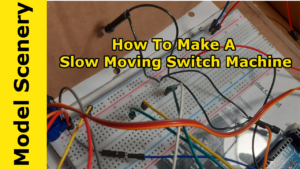
Video Breadboard Demonstration of DIY Turnout Motor
This link will take you to a video showing you this in operation. DIY Switch Machine.