

Tips and techniques for soldering SMD LEDs to magnet wire. A simple process applicable to all SMD LED sizes useful for beginners and experts.
The Process Of Attaching Magnet Wire
Because of the minute size of SMD LEDs, thework involved requires organization, cleanliness and holding the LEDs steady. The process shown in this page makes soldering these LEDs easy even for those who have shaky hands.
Wire Placement
 This is how we will attach the wires. The wire is easily bent so it can be attached in a way that it protrudes from the LED just as you wish.
There are tabs on the back of the LED. You may wish to solder the wires to the LED and then check the polarity or check polarity and then solder the wires.
But if you wish, you can check before soldering. Checking polarity before wiring is easily done with a couple probes. Sometimes you can also tell the polarity by looking at the front of the LED. There will be a small triangle a point of which points to the positive tab.
Preparation Of The Magnet Wire
The first step in the wiring process is to prepare all the wires that you will need. It is a safe bet to prepare a few extra.
All your wire should be ready before you even start to remove an LED from its tape.

This video shows the process. Click Here
Attaching Wires To LEDs
 Setup by placing the LED on a ceramic tile. Hold it in place by covering one tab of the LED with a flat metal bar. The image to the left shows the setup.
Apply a minuscule amount of flux to the LED tab.
Lay the wire in place on the tab and tap it with a fine tipped soldering iron tip on which a small amount of solder has been added.
It is critically important that the wire that you use is perfectly prepared. The tip must be absolutely enamel free. Watch this video.
Post Soldering Requirement
Cut any protruding tips from the led.
Test the solder joints by powering from the free ends of the wires and ensuring that the LEDs light. 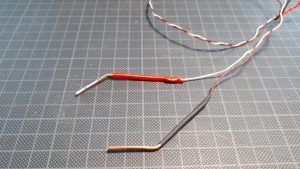 The image to the left shows a simple set of testing probes made from some copper cable hammered flat and soldered to leads that go to a power source.
 The setup that you see on the left makes it easy to control the fine wires.
After that, insulate the joints and any exposed wire by painting it with an enamel insulator. Clear nail polish will do the job.
Eventually you will probably have to attach the magnet wire to thicker wire. We cover how to do that in this page.How To Solder Magnet Wire
You can get a full selection of LEDs here.