This is a time saving technique that also makes better looking scenery than you get when you add tufts separately.

Adding tufts in this manner offers you the opportunity to add a lot of variety through changing colors and grass size.
Recommended Materials To Add Grass Tufts In Place
- High Powered Static Grass Applicator – Recommended – Click Here
- External Strainer Grass Dispenser – Recommended – Click Here.
- High Quality, Highly Electrostatic Static Grass. Recommended – Click Here
- White Glue Slightly Thinned
Note: Don’t waste your time with a fly swatter static grass applicator. Electronic fly swatters aren’t much use even against flies. The fly only flops away with substantial memory loss. They aren’t even strong enough to do that to static grass.
If you are going to do static grass work, do it right. Get a powerful unit with multiple capabilities.
Plan the look you want to achieve and where you will add tufts. Consider making a sketch of the area under consideration and mark where and what type tufts you will add.
Mix the grass as to colors and sizes. You may make a few distinct mixes so you can easily make different tufts without having to stop. And when you finish, save the different mixes for future use.

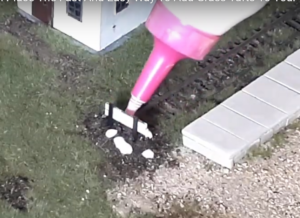
Lay your glue.
If you want to reshape the resulting dot of glue, use a small wet brush.
A long nosed plastic bottle makes it easy for you to control tuft location exactly. In fact, I use this to store what I call “grass glue” for general purpose static grass application.

If you want to adjust the size of the tuft, work the glue with a damp brush. Not too much water so as not to dilute the glue.

For best results,with your fingers, drop grass on the glue.

Tease the grass up with the grass dispenser.

This video shows the process in full. How To Make Grass Tufts In Place
This tutorial is part of our series on how to use static grass. The main page can be found here.

