

What’s In This Page
Basic rules for wiring and how to wire a DC model train layout for multiple train and block control. There are also selected video insertions.
If you are using a phone, at the bottom of the page there are links to many supplies for modelers. Otherwise those links are in the sidebar to the right. You can also find other information by using the search function that is in the navigation bar above.
The Latest Information
Anything new and page updates are posted on X (formerly Twitter), Rumble and Facebook.
It is easy to keep up with the latest by following us on either of them.
Free Help
If you need help or guidance with your seafoam, contact me using the WhatsApp button. WhatsApp is a FANTASTIC, FREE communications system. If you do not have it, click on the button and you can install it on your phone. If you are unfamiliar wit WhatsApp, read about it here. Click on About WhatsApp.
Cab control terms
Block: A section of track on a layout that is electrically isolated from adjoining sections by use of plastic rail joiners or gaps cut in rails. Blocks can be any length – usually determined by a specific track plan.
Block switch: A single-pole double-throw (SPDT) electrical switch that’s used to connect one wire to either of two other wires. While most hobbyists think of toggle switches like those shown in figs. 1 and 2, slide and rotary switches can also have SPDT contacts. Some SPDT toggle switches are made with a center off position that does not connect to either wire.
Cab: Another name for a direct-current power pack with speed and direction controls to operate a train.
Cab control wiring: A method of wiring a model railroad using two or more power packs and track electrical blocks to allow independent operation of two or more trains.
Common rail: An electrically continuous rail that connects both power packs to complete the common electrical circuit. The other rail is called the “control rail” in which gaps are cut to define the electrical blocks.
Feeder: The wire connecting a segment of rail to the power supply.
Wiring Process
Many model railroaders want to operate two trains on their layouts at the same time, each with independent speed and direction control.
This milepost can be reached with cab-control wiring. With two direct- current power packs, single-pole double-throw toggle switches, and hardware-store wire, you can divide any layout into electrical blocks that will allow two trains to be operated independently.
How it works
video
With cab-control wiring, a layout using two power packs is divided into several electrically isolated sections called “blocks.” Each block is independent of all the others. So a train in block A can be operated by power pack A, and a train in block B can be run by power pack B.
Each block starts and ends with a plastic insulated rail joiner or a narrow gap cut through the metal rails. So while a cab control layout visually looks like a continuous track, electrically it’s several independent track sections that line up with one another at each end.
As an operator using power pack A moves his locomotive through one block and approaches the next block, he uses a toggle switch to connect the second block to power pack (cab) A. Now the two blocks are electrically united to cab A and the locomotive seamlessly moves from the first block to the second. Just before he enters a third block, he again connects the new block to cab A. Following this pattern, the operator can move his locomotive from one end of a layout to the other.
While this is occurring, a second operator using cab B can operate his locomotive elsewhere on the layout by connecting the blocks he’s using to cab B. In this manner, the two operators can follow each other around a layout, flipping toggle switches to align the blocks to cabs A or B as needed.
Two locomotives cannot share the same block at the same time. Operator B has to wait until operator A has cleared a block in order to toggle control of the power in that block from cab A to cab B.
IMAGE Single-pole double-throw (SPDT) electrical switches can connect only one cab to a block at a time, so there’s no way for both operators to connect their power packs to the same block at the same time. Signal lights at either end of the blocks show the limits of each block so one does not run into another block controlled y the other cab.
IMAGE We use SPDT switches that have a center off position that doesn’t connect power in either direction. This is especially useful for passing sidings (and spurs), since it allows you to cut power in that track to park a train.Each block has a feeder wire connecting it to an SPDT switch. If a layout has six blocks it will need six SPDT switches.
When making track blocks, you need to insulate or cut a gap in just one rail, not both. Think of a light switch in your house. When you turn a lamp on or off, you are only interrupting one of the wires that lead to the lamp, not both.
In cab-control wiring, the rail that isn’t insulated or cut is called the common rail. This rail gets connected to both power packs. See the blue wire in fig. 2. While connecting two power packs in this manner may cause a bit of anxiety for a model railroader new to electricity, trust us, it works.
Power Distribution
This is a basic block wiring diagram set up for two cab control where trains run in one direction.. The positive rails are isolated and the negative rail is continuous and connected to a common ground. You can copy this image and use it for reference and notes.

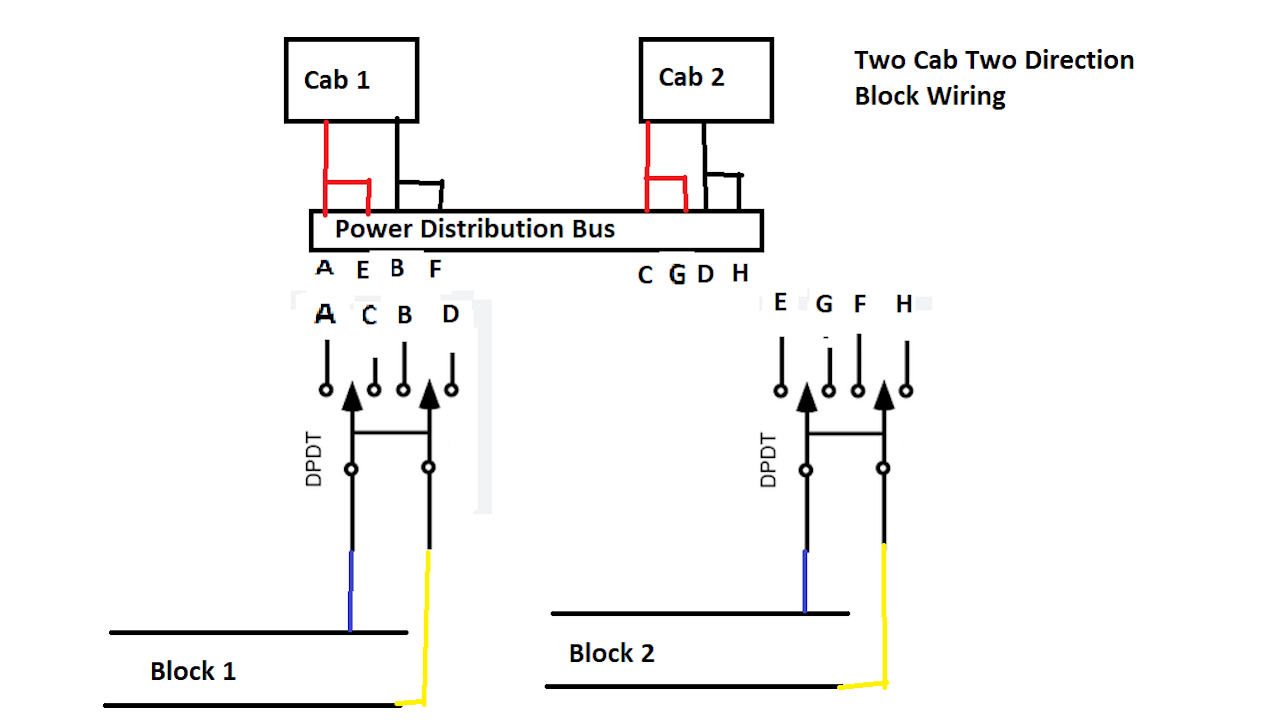
Two Cab, Two Direction Block Wiring
Train direction depends on track polarity. To run two trains in opposite directions, both track rails should be isolated.
Selecting a cab requires the use of a double pole double throw switch. Additionally since each block is isolated, power to the switch must go through a power distribution bus.
This a wiring diagram for two blocks. The letters indicate the connection points for every wire. For example, one end of a wire connects to A on the power distribution bus and the other end connects to A on the switch.

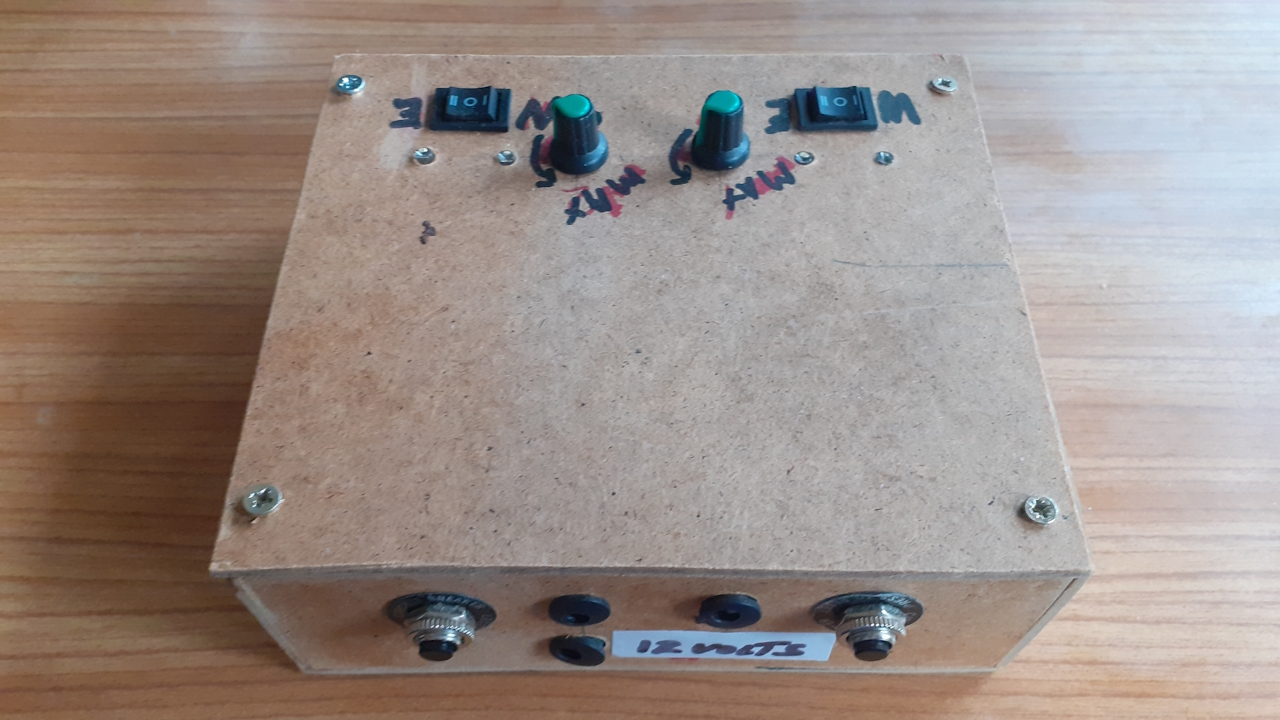
Power packs
The easiest way to build a cab-control layout is by using a pair of identical DC power packs.
.
Cab control terms
Block: A section of track on a layout that is electrically isolated from adjoining sections by use of plastic rail joiners or gaps cut in rails. Blocks can be any length – usually determined by a specific track plan.
Block switch: A single-pole double-throw (SPDT) electrical switch that’s used to connect one wire to either of two other wires. While most hobbyists think of toggle switches like those shown in figs. 1 and 2, slide and rotary switches can also have SPDT contacts. Some SPDT toggle switches are made with a center off position that does not connect to either wire.
Cab: Another name for a direct-current power pack with speed and direction controls to operate a train.
Cab control wiring: A method of wiring a model railroad using two or more power packs and track electrical blocks to allow independent operation of two or more trains.
Common rail: An electrically continuous rail that connects both power packs to complete the common electrical circuit. The other rail is called the “control rail” in which gaps are cut to define the electrical blocks.
Feeder: The wire connecting a segment of rail to the power supply.
Insulated rail joiner: A rail joiner made of an insulating material such as plastic instead of metal.
One can use two power packs for two operator cab control,
 or a single operator two motor power pack.
You can get kits to make either of these at this link.
This image shows a simple demo setup made in accordance with the wiring diagram that is above.
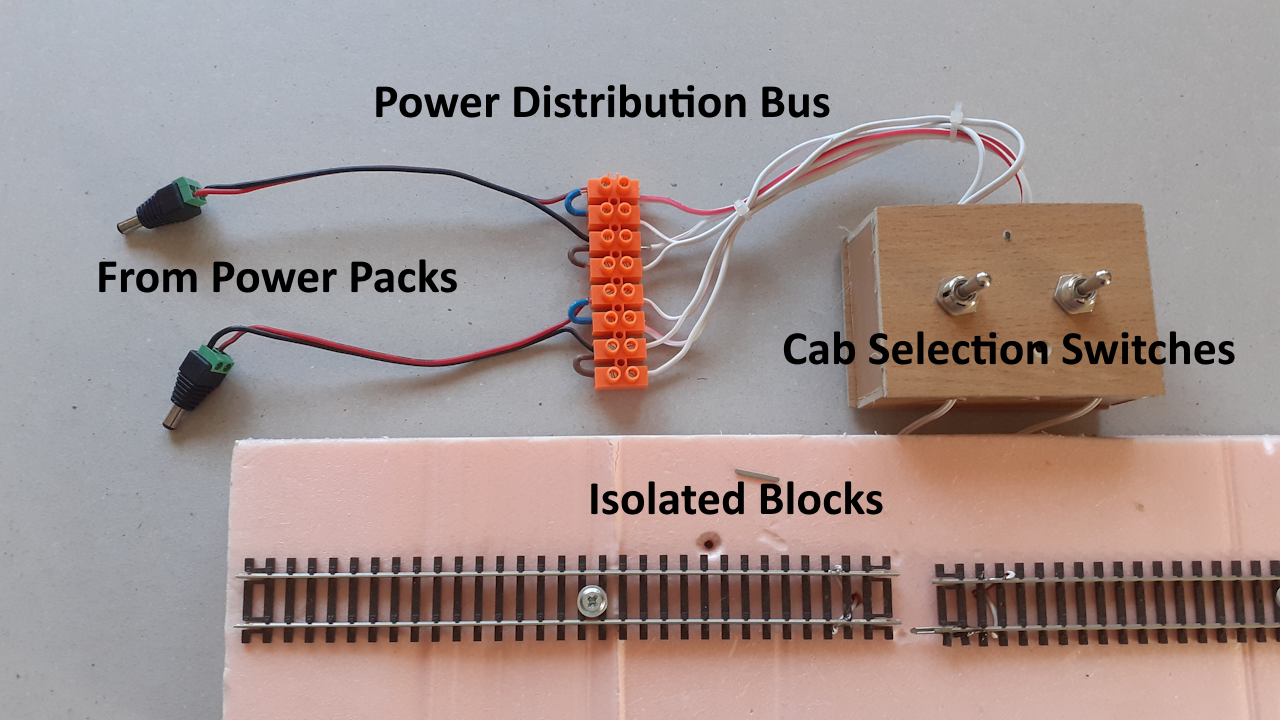 LEDs that indicate which blocks are selected can be added to the block switch control panel.
Videos

This video gives you a detailed explanation of the wiring diagram for one direction operations.
Power Supply
When your blocks are in place, you can use any power pack on hand. There are many commercial varieties available.
But before you spend a lot of money, here is a way that your power supply can be inexpensively made. This link takes you to an illustrated step by step guide with supporting video instructions that show you how to make your own. Click Here.
Questions, Comments, Help
If you need help getting your layout running, have any questions or have comments that would help us make this page better, please contact us here.
Free Help
Reminder
You can get seafoam branches and seeds here.