


Thunderstorm With Colored Lightning
What’s In This Page
This page shows you how to make a thunderstorm that flashes various displays of blue and/or white lightning strikes. It takes you through how the ThunderBoard Pro kit is assembled. It then describes the many different light strike routines from which you can choose. Finally from this page you can download – free- any or all such programs.
If you are using a phone, at the bottom of the page there are links to many supplies for modelers. Otherwise those links are in the sidebar to the right. You can also find other information by using the search function that is in the navigation bar above.
The Latest Information
Anything new and page updates are posted on X (formerly Twitter), Rumble and Facebook.
It is easy to keep up with the latest by following us on either of them.
About The Assembled Circuit Board
With time we have been developing more advanced thunder boards. Each advanced board has additional capabilities. Regardless of the board that you have, the assembly process is essentially the same. Only the look of the board and what it will do will vary.
Features
- Controls WS2812B LED strips.
- Arduino mini Pro controls flashes on LEDs strips.
- Arduino mini Pro comes fully programmed.
- Programs on the Arduino Mini Pro can be changed.
- Thunder sounds played are on an SD card in the mini MP3 player.
- Can play sounds on an external Bluetooth speaker.
- Can provide gate voltage to MOSFET switch to activate external application.
- Speakers can play monaural or stereo.
- Can connect to 5 V amplifier for more impressive thunder in effect.
Connections
Screw connectors on boards will have the following labels.
Screw Connectors Labeled – +5v E1 E2. – A 5v power supply connects to – and +5v. E1 and E2 output +5v whenever the MP3 is powered up. These outputs can be used to activate programs housed on remote boards. One such board could use another mp3 player to broadcast rain sounds. So you not only have thunder and lightning but also a background rain storm. How that is done at MP3Remote.
Screw Connectors Labeled +5v Audio L Audio R – . These are used when you broadcast your thunder on a remote Bluetooth speaker. How that is done is at Bluetooth Speaker.
Screw Connectors Labeled S1 – – S2. – You can connect two speakers at these points. Such connections will give you stereo output. It here that you can attach a 5v amplifier. How that is done is at 5v Amplifier
Screw Connectors Labeled Data(Number 1 to 3) – +. WSb2812B LED strips are conned here. It is possible to connect 3 strips. In this case we will connect only one strip and that shall be to DATA!.
Mini MP3 Player. – The player is simply inserted, oriented as directed on the board, into the DuPont pin sockets. It comes to you with and SDcard on which are some standard thunderstorm sounds. You can change them, How to do that is here.
Arduino Mini Pro – This Arduino board is set up to control one LED strip and that is the one on DATA1. It comes to you with a storm program loaded. You can change that program. How to do that is at FTDI Programmer. A list of the programs available is below.
The Materials
The project is assembled from a kit that contains a circuit board and the necessary elements to be added to the circuit board. You can get that kit here.
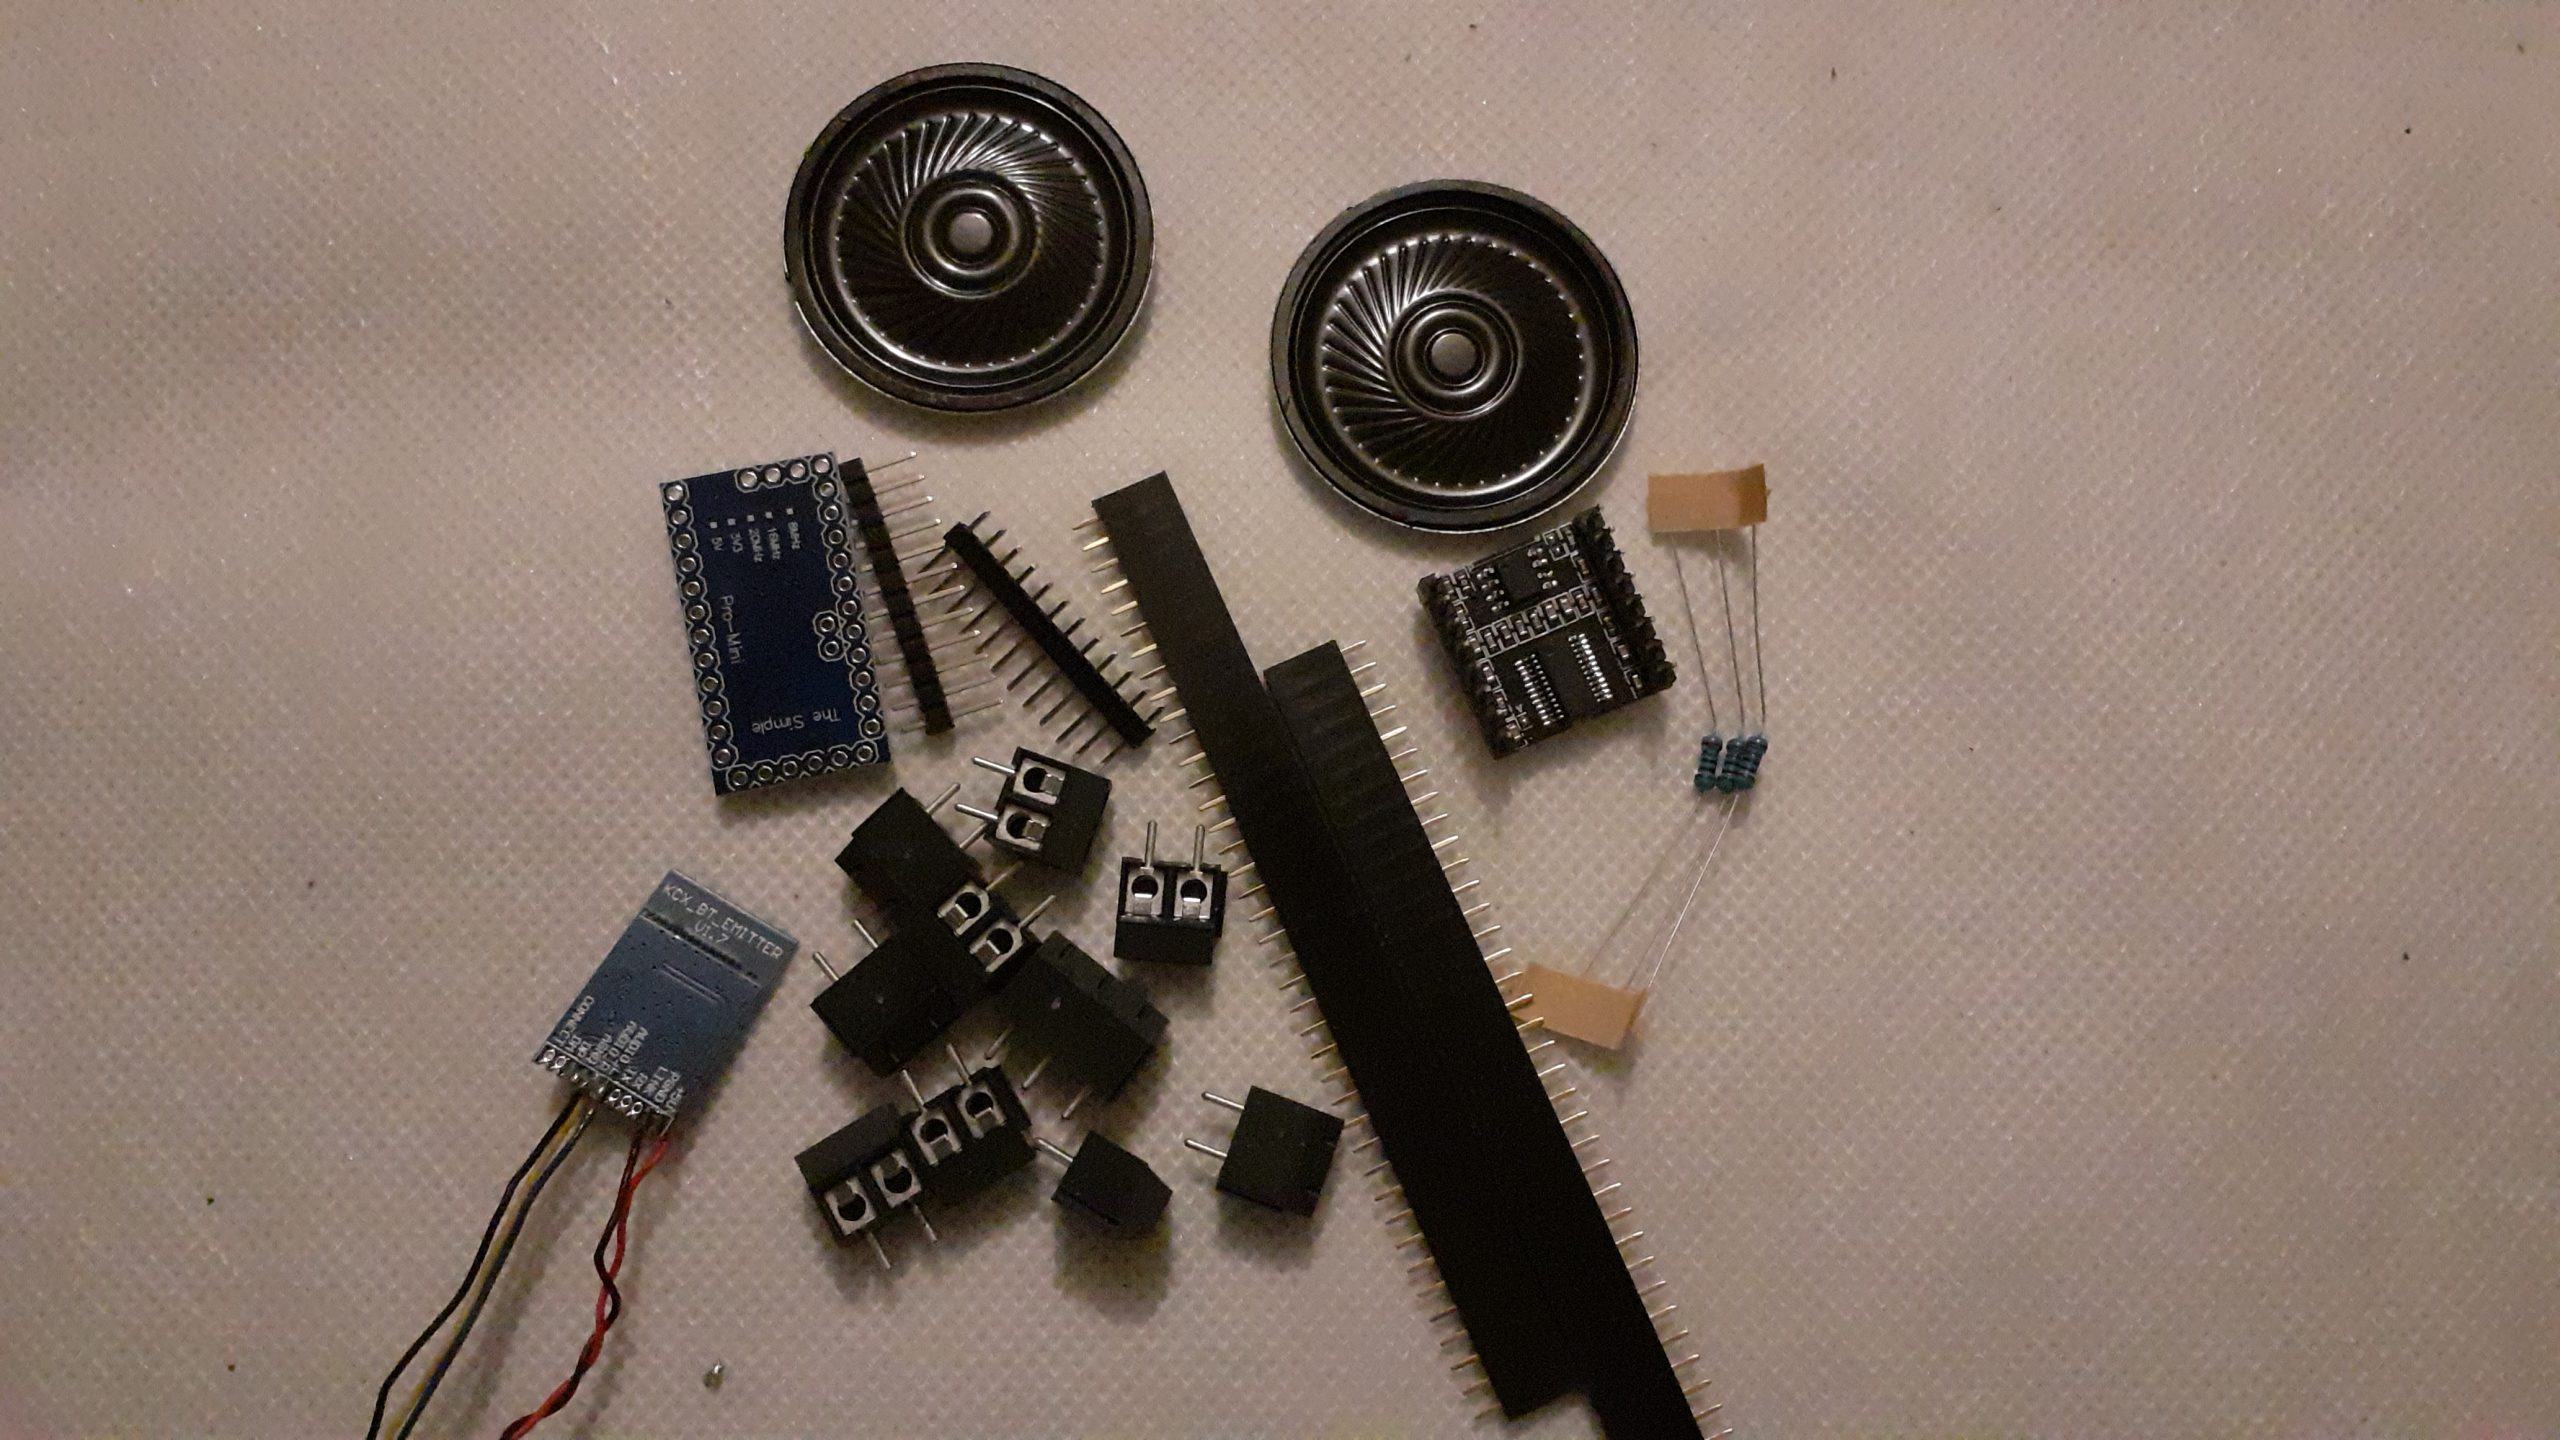 The parts are shown in the image to the left.
The Arduino board comes fully programmed with the most popular thunder and lightning display.. There are other programs that will you different displays.
They are:
Colredlightsoff
darkbluelightning
randomledlightning
radomwhieleds
randombluewhitelightning
They can be conveniently downloaded from Pastebin. Click Here.
Assembly Notes
The screw terminals come as 2 pin units. They are designed to be joined by using the slots on each side. So, for example to make a 4 pin screw terminal, join two two pin terminals.
The pins on the MP3 Player and Arduino board connect to the circuit board via DuPont pin sockets. Cut the pin sockets to length and insert the pins into the sockets.
The sockets will be soldered to the circuit board. With the pins or the MP3Player and and Arduino board inserted, you can be sure that the pin sockets will be vertical when soldered to the board.
Note the text on the board that shows where you place the circuit elements.
All connections between parts are made via traces on the circuit board.
The circuit board shows exactly where the elements are placed on the board,
So it is a simple matter of inserting the parts, soldering them in place with a fine point soldering tip on which there is a minuscule drop of solder and finally trimming off any protruding wires or pins to a comfortable length.
Now add all the elements to the board and solder in place.
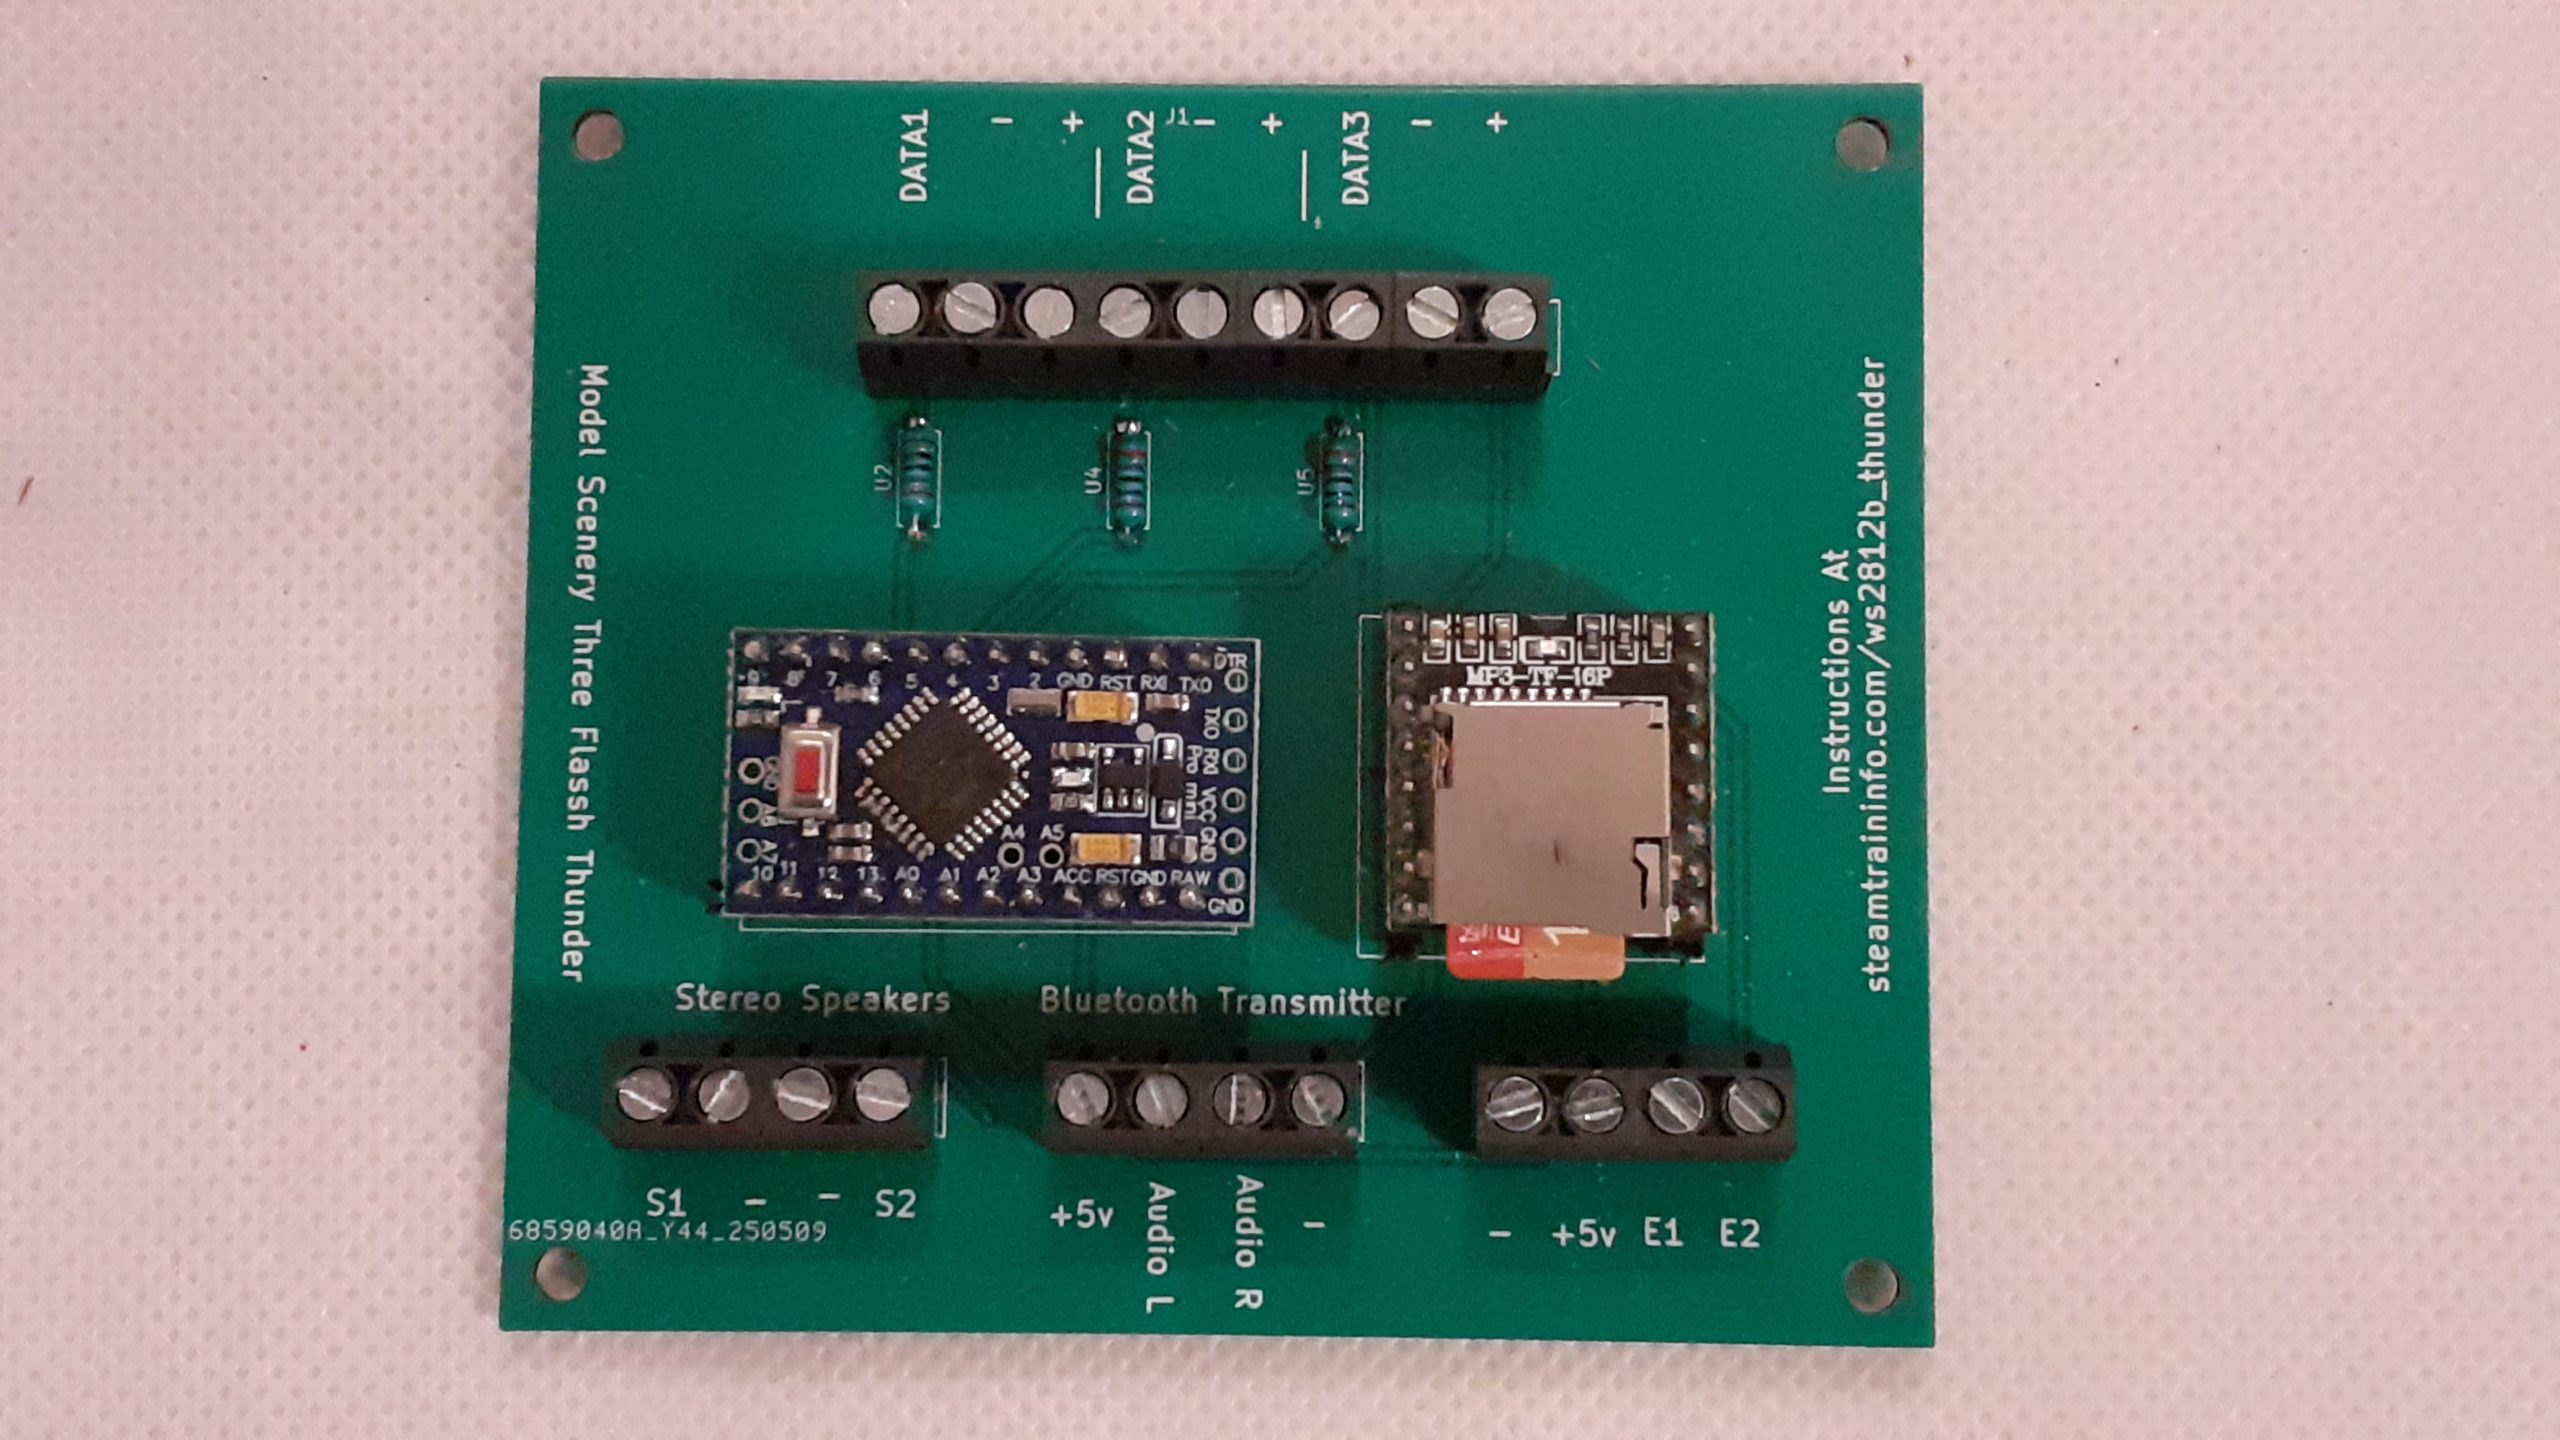 The board ready to use.
The SD card is loaded with the recommended sounds for this project. If you wish to use different thunder sounds, this page shows how to load them on the card . You can get other sounds here. Player Sounds
The flash rate depends on the thunder sounds that you have on your SD card.
How To Use
The program controlling the LED strip can be used with strip laid out in a line or coiled inside a puff ball cloud. You can add a second strip to the same screw terminals and make either a second cloud or a larger single cloud. To read about information about doing both, Click Here
The storm starts when the board is powered. You can switch it on and off with a manual switch, push button, an ESP32 switch or a phone using an app such as Serial Bluetooth Terminal.
Videos
These videos show examples of the program in action.
 To watch this video. Click Here
 This shows some alternatives. Watch the video clicking here.
Free Help