How to fade LED lights using an Arduino Micro controller.
A tutorial including Arduino sketches, wiring diagrams and video demonstrations of fading lights on an off.
Materials Required
 Arduino Nano or Uno or Mega

LEDs
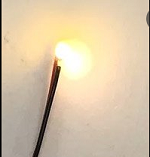
The size may vary from smd LEDs to 5mm. We use prewired SMD LEDs for street lights.
 Resistors
Calculate the resistance value using the data for your LED and one of the online LED Ohms Law calculators.
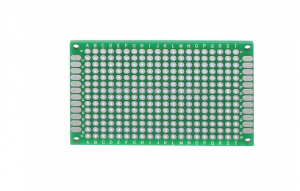
 Prototype Board
Perf board, as shown, or Vero strip board can be used. Our preference is Vero.
 TLC 5940 (optional) This allows you to increase PWM capability on your board
What These Parts Do For You
With these you make a standard multi-functional LED control board. You can get all these parts for such a control board, and instructions on how to make one, in a discounted package at PolandsBest Electronics
You can choose a package either with or without LEDs.
Micro controller Limitations
In order to fade lights, the lights must be connected to PWM pins.
On an Arduino Nano and Uno, there are only 6 PWM pins. So generally speaking, you are limited to fading only 6 lights via one of these boards.
There is, however, a workaround that you can use. Each pin can pass 40 ma on any one pin. So you can measure the current your LEDS are passing and connect more than one LED to each pin. You must not exceed the 40 ma and must remain below the 400 ma total board capability. For safety sake, it is best to stay well below both those margins.
You can also use a second or third nano. They are cheap and you can fade 18 lights.
An Arduino Mega has 15 PWM pins. They are pins 2-13 and 44-46 A mega is rather expensive, but because of the large number of pins on a mega, you can multitask and apportion the cost among the various tasks.
Cheaper than using a Mega for only fading lights is to use a TLC 5940 It is a bit more complex to use but is definitely cheaper than a Mega. The setup is a bit out of the ordinary so we do not cover it in this page. Read about using it at TLC5940
A Control Board For A Nano
Fading Six LEDs
This board is set up to fade 6 LEDs.
 Prewired SMD LEDs will be controlled by this board. The resistors we show are 270 ohm. Use a resistor value appropriate for you
Image of Control Board To Fade 6 LEDs.
The Sketch
Sketch To Fade 4 LEDs
We are showing a sketch fading only 4 LEDsbecause it is one we use in one of our dioramas.
This firs video shows the sketch in action on the Wokwi Code Simulator. For simplicity’s sake, we did not include the resistors. When we use this sketch, we do not use a manual switch but use an input from a cycle control board. You can see how that is done at Daily Cycle.
The Arduino Code To Fade Lights
Video Tutorial
Get Materials
Questions, Comments, Help

